
Have you got lots of paper-based worksheet resources saved as PDFs and you are wondering if they can be used with online or hybrid classes? In this guide I’ll show you how to make Google Slides worksheets from PDF worksheets, so that you can share them with your students through Google Classroom or other suitable Learning Management System.
Before we start
Are you using Google Classroom? Does your Learning management system create individual copies of digital resources for students so that they are not all working on your original file at the same time? If not, check out our quick start guide to Google Classroom.
A quick assessment
Before we spend some time converting our files – we should have a critical look at the worksheet. Is it a pdf made from a word doc? Or is it a scan of a photocopy that looks fuzzy and pixelated when zoomed in? If the latter, it may not be worth your time following this procedure, and your time may be better spent typing the whole thing out yourself. If your worksheet passes scrutiny, let’s continue.
Two resources – two methods
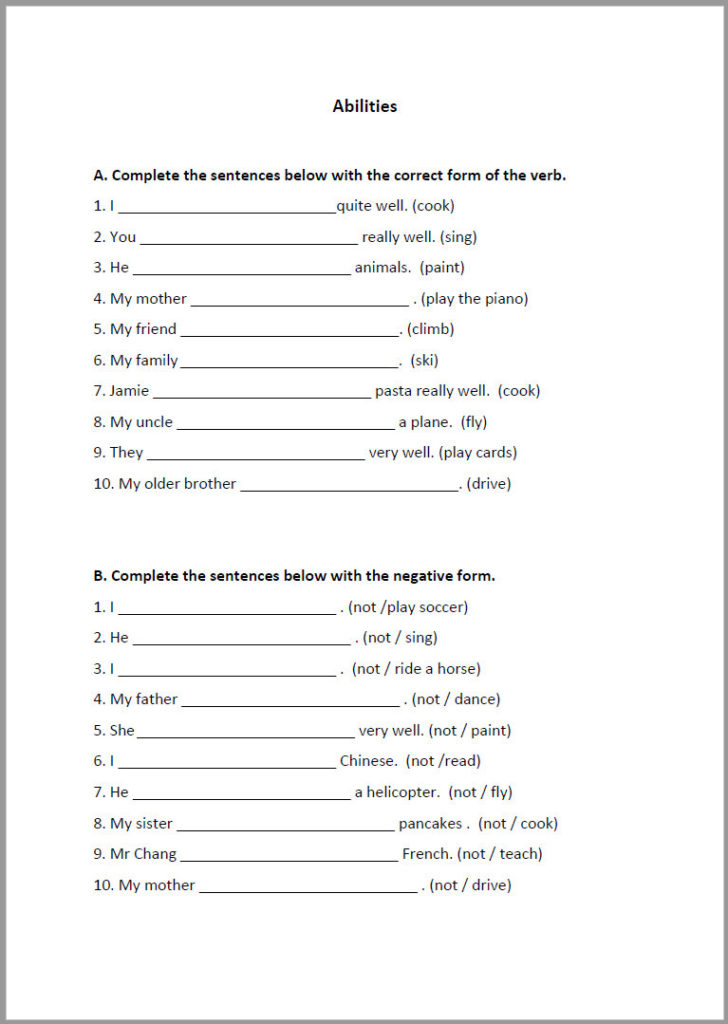
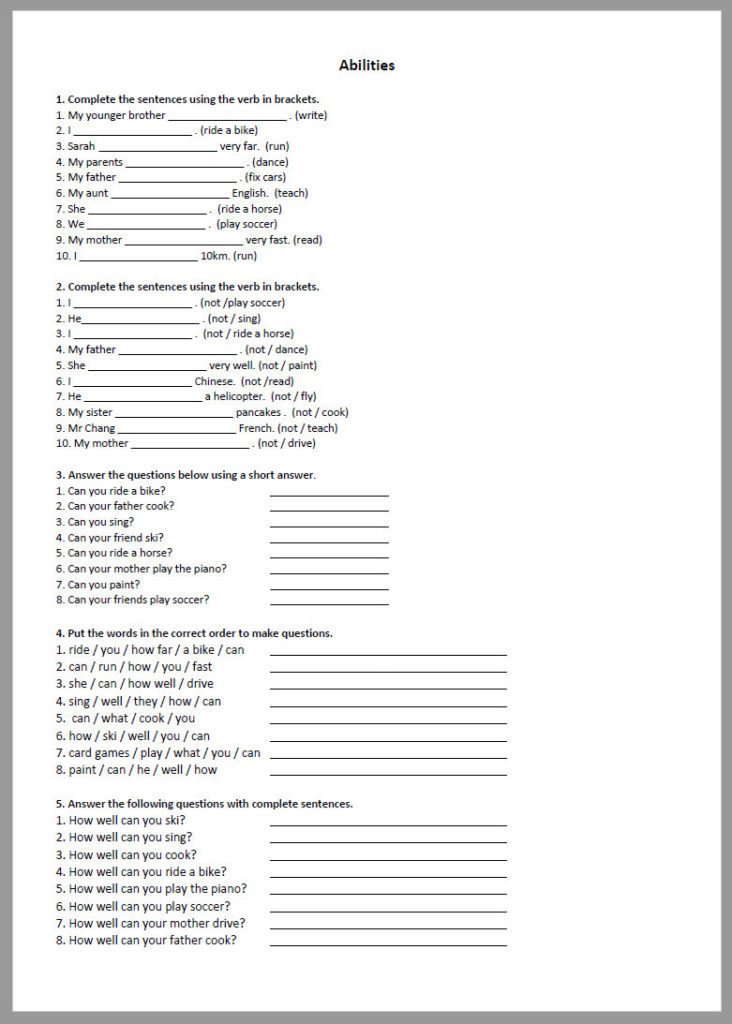
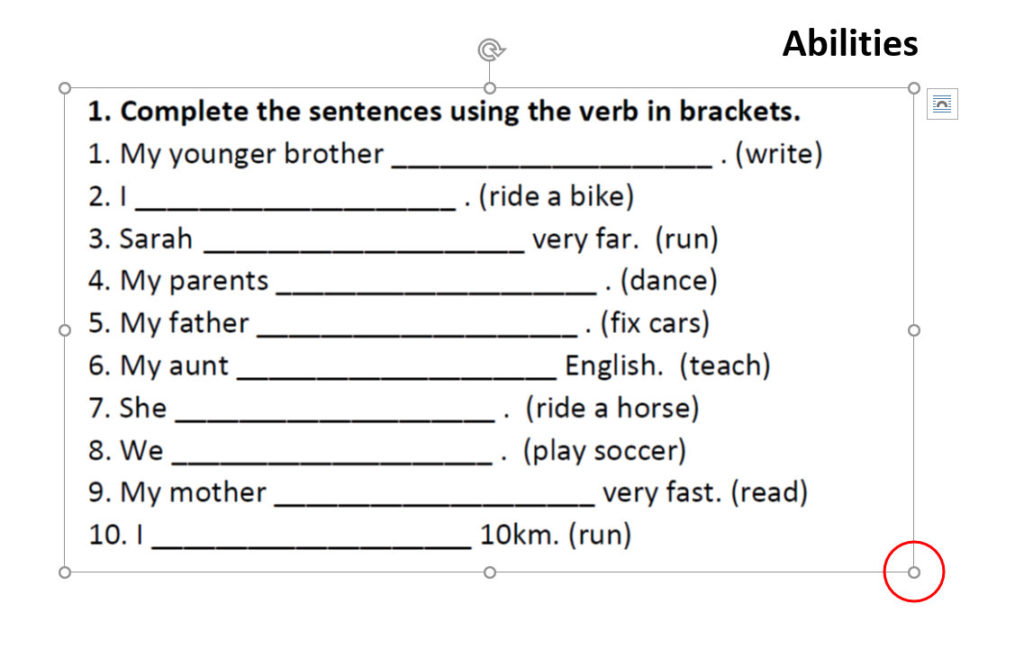
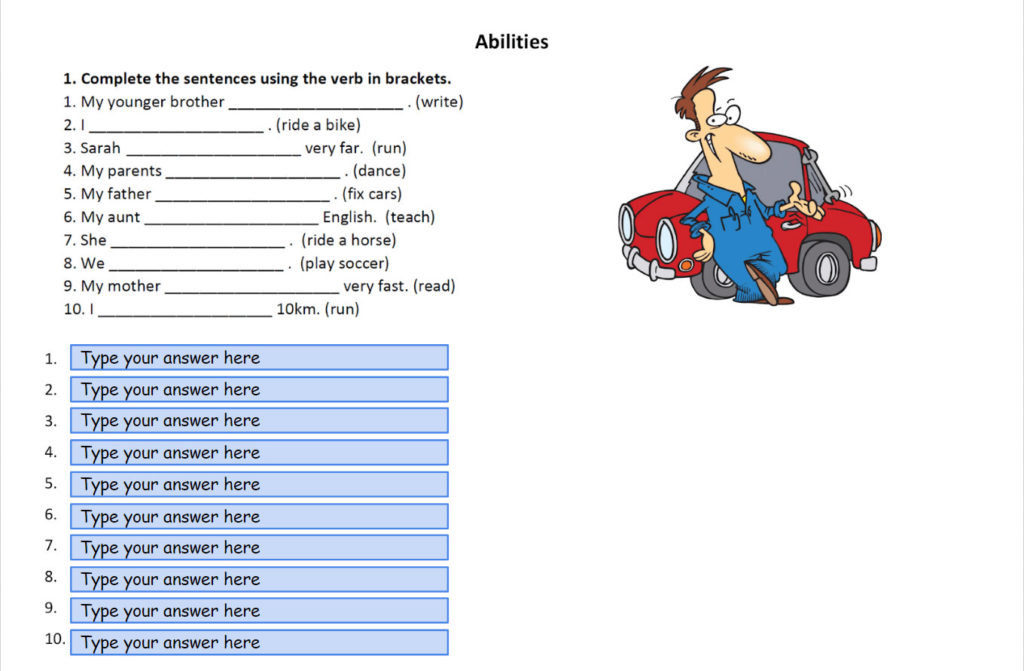
Let’s say I have 2 worksheets. One is ideal for converting to a digital Google Slides worksheet. There are only two exercises on the whole page, they font size is quite large and there is plenty of space between lines (image 1).
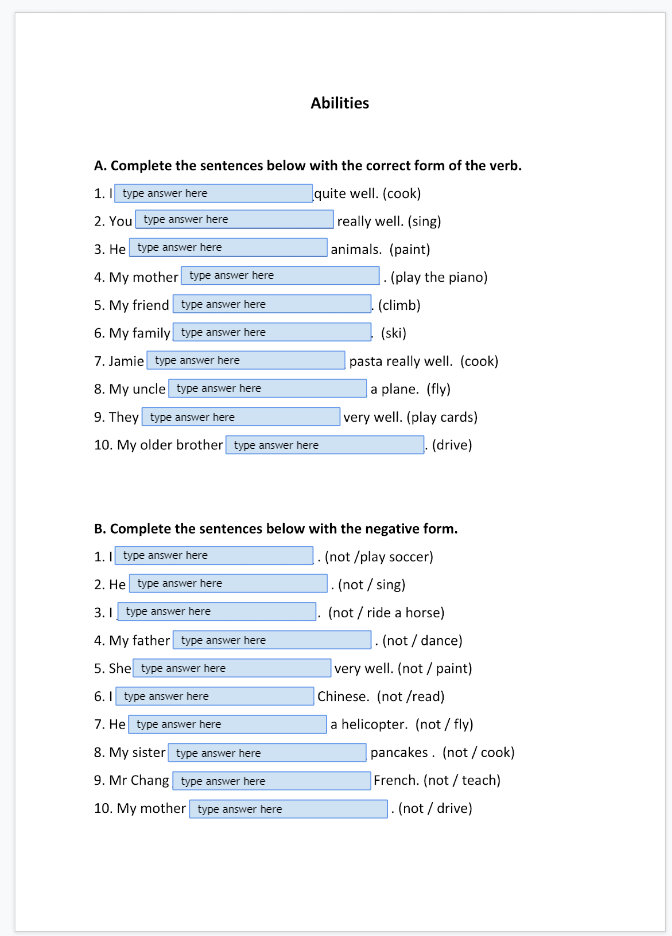
The second worksheet has 5 exercises crammed on to the page, the font size is small, and there is very little space between lines. First, I’m going to show you how to convert the ideal worksheet, then I’ll show you a strategy for converting the second, less than ideal, worksheet. Let’s begin.
Method 1 – the ideal worksheet
1. Make a png
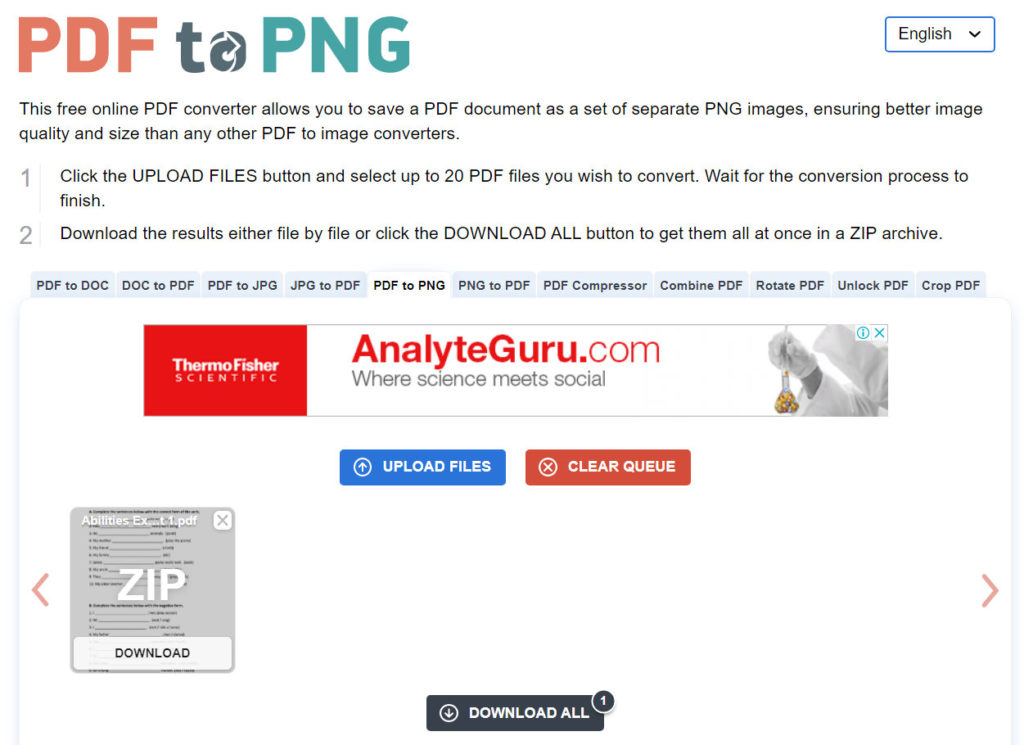
The first step is to make a .png file from the pdf. PNG is a type of image file that we need to add to Google Slides. To convert your pdf, go to www.pdf2png.com.
Drag and drop your pdf file, wait a few moments, then download the file. The download will be a zipped file, so unzip it to extract your worksheet in png form.
2. Make a new presentation
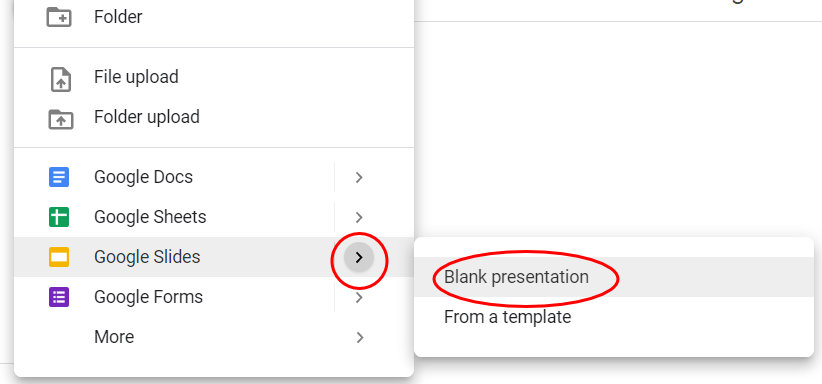
Go to your google drive, and make a new blank presentation. Before we add our image, we are going to set up the page first.
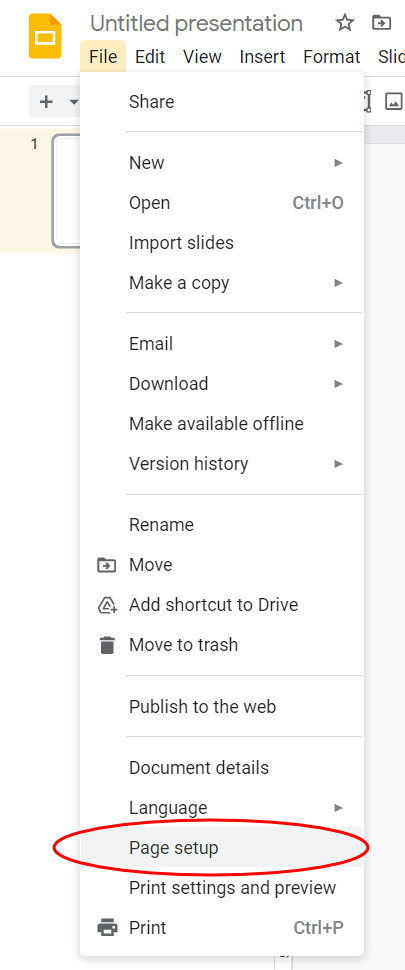
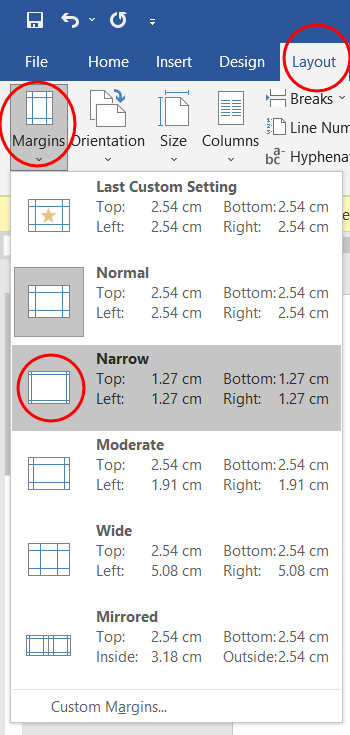
The blank title slide will have two text boxes, click on each one and delete them. Next, we need to set the slide size. If we want the option to print the worksheets, then we need to set the slide size to either match A4 or US letter print size. As my worksheet is in portrait, I will set the document size to match that (W:21cm , H:29.7cm)
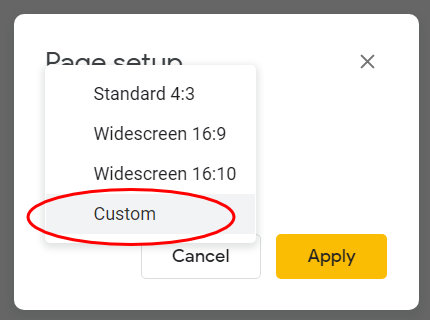
Go to the ‘file’ dropdown menu, and near the bottom, choose ‘page setup’.
Click on the dropdown box that says ‘Widescreen 16:9’. Choose custom, and enter the dimension that match your worksheet.
3. Add the png to the background
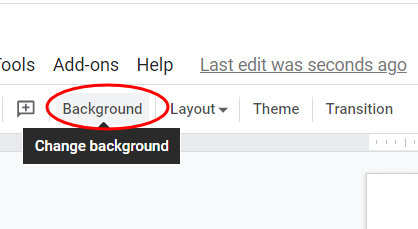
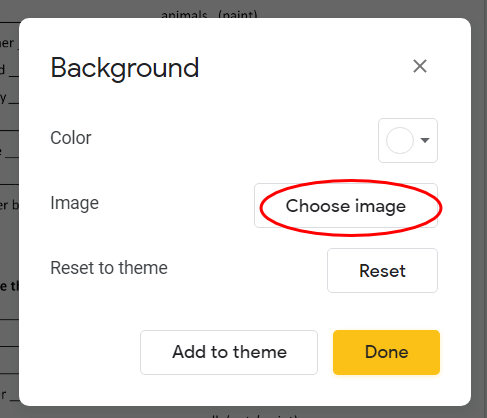
We are going to put the png of the worksheet in the background. This will mean students can’t interact with it at all; they won’t be able to move it or delete it. Click ‘background’ (see image), then click ‘choose image’ , and browse for the png worksheet file we made earlier. Then click ‘done’. Your worksheet should now be on the page, yet you should be unable to move it or interact with it in any way.
4. Add text boxes
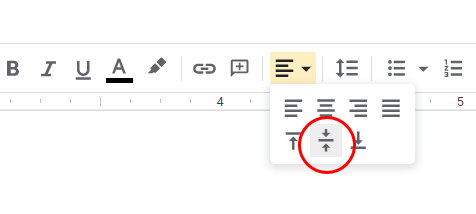
Before we start, we’ll probably need to zoom in somewhat. Click the ‘zoom’ button and choose an appropriate setting. Next, click the text box icon, and draw a text box. Don’t worry if it looks too wide right now, we are going to change some settings. First, drop the font size down a few points. Next click the ‘align’ tab and choose the ‘middle’ option, which appears below the ‘center’ option (see image).
Now, type in some text such as ‘your answer here’. We want to adjust the height of the text box, so find the square on the bottom of the text box, hover over it with the cursor until you see the double (up/down) arrow (see image).
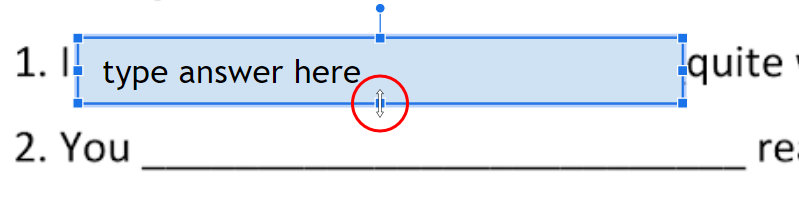
Click and drag until the text box is an appropriate height. If the box height is too narrow for the text you may need to reduce the font size further.
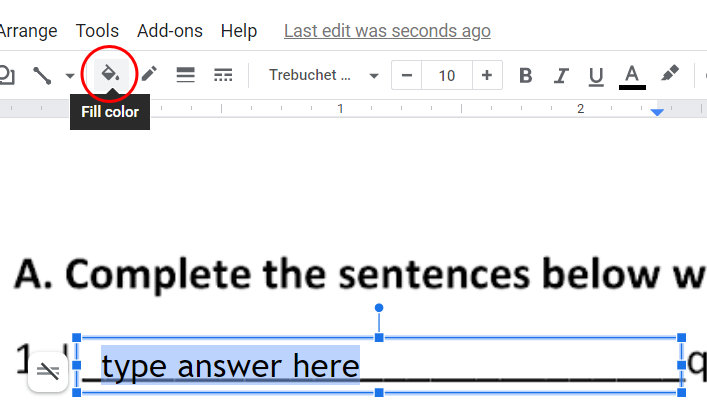
5. Highlight the text box
We need to make it clear to students where they should type their answers, so colouring the text boxes is a good idea. With the text box selected (click the border) click the ‘fill color’ tool and choose a faint background colour.
Next click the ‘border color’ tool and choose a slightly darker color for the border of the text box.
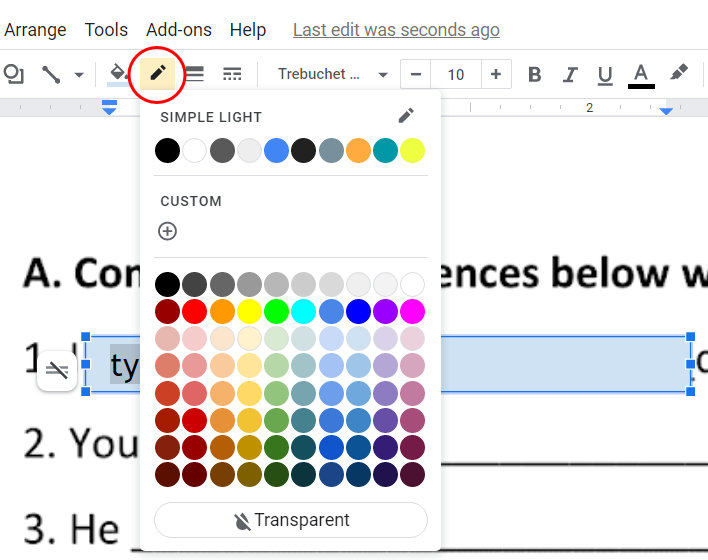
Finally, click the ‘border weigh’ option, and choose a thicker border.
6. Duplicate the text boxes
Now we have one perfect text box, we’ll copy it. You can copy and paste, and then drag the new box. However, I like to do it a little differently: hold down control, hold down LMB on the the text box, and drag it to the location. A new text box is created as you start dragging. Release the LMB before you release the Control button.
Once we have a few boxes, we can select all the boxes, and duplicate them to save time. Simply, hold LMB and drag over all the text boxes to select them.
7. Position the text boxes
You can use the arrow keys to position the boxes as well as dragging with the mouse. Often this is easier if you just want to move it in one direction. However, the arrow keys move things by quite a few pixels. For finer adjustments, hold down the Shift button and use the arrow keys.
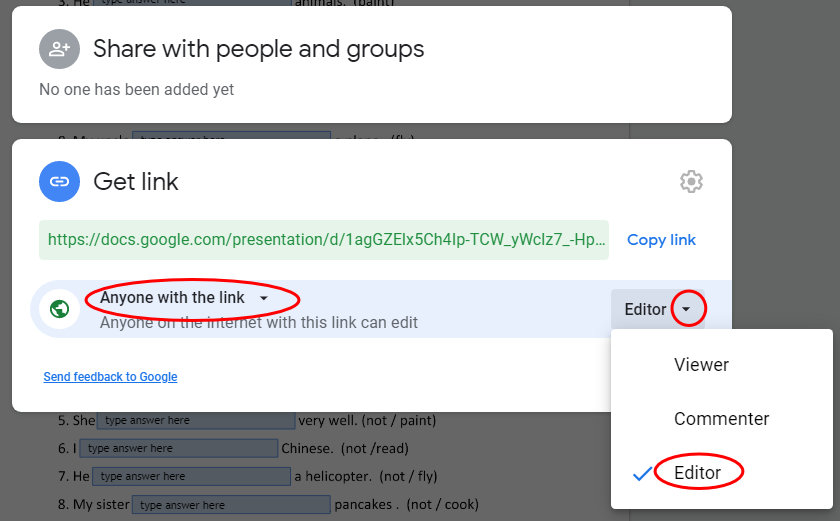
7. Ready to share
Your worksheet should be ready to share. But before we do that, don’t forget to add a filename. When we share the worksheet we want to choose ‘anyone with the link can edit’. This is because students must be in edit mode to use the slide as a worksheet – it will not work when in presentation made.
Method 2 – The less than ideal worksheet
What if our worksheets are chock full of exercises, with tiny type and very little spacing like the one in the image below? If we followed the same method, the text would be small and difficult to read, and to would be very difficult to squeeze in all the necessary text boxes.
We’re going to set it up a little differently. If we want all 5 exercises, we’ll split them over 5 slides.
As we are not restricted to the layout of our original document, we will set our document up as landscape. This will be more suitable for viewing on Google Slides.
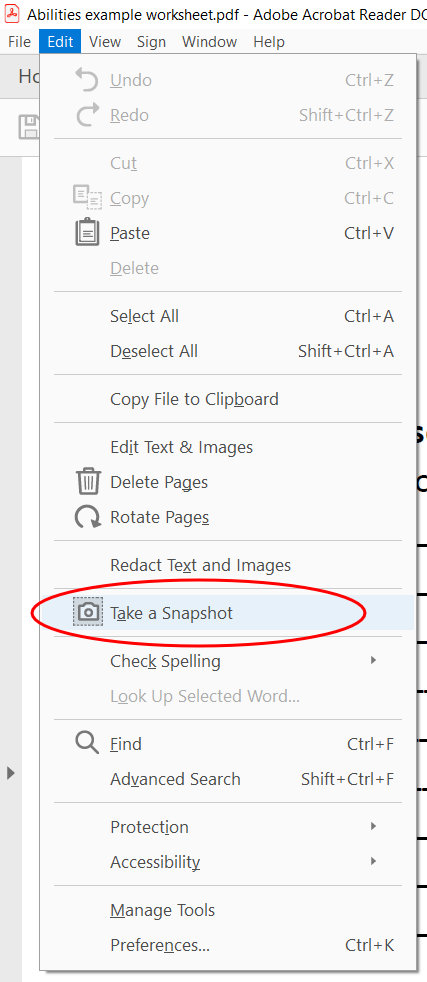
1. Open in Acrobat Reader
Open your PDF worksheet in Adobe Acrobat DC. If somehow you don’t have it – it’s free and available here. Go to the ‘edit’ drop-down menu, and find ‘Take a Snapshot’ (see image).
Use the LMB and drag the selection box around the exercise you wish to use. When you release the LMB it will automatically be copied to your clipboard*.
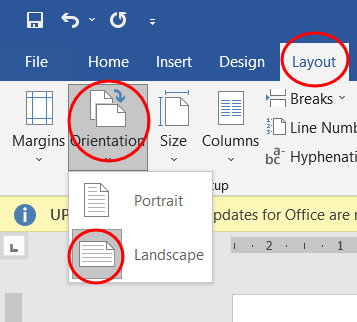
2. Open up a new document in Word
Open up a new document in Word. Under the ‘layout’ tab, set to landscape and reduce the margins (see images).
3. Paste your exercise
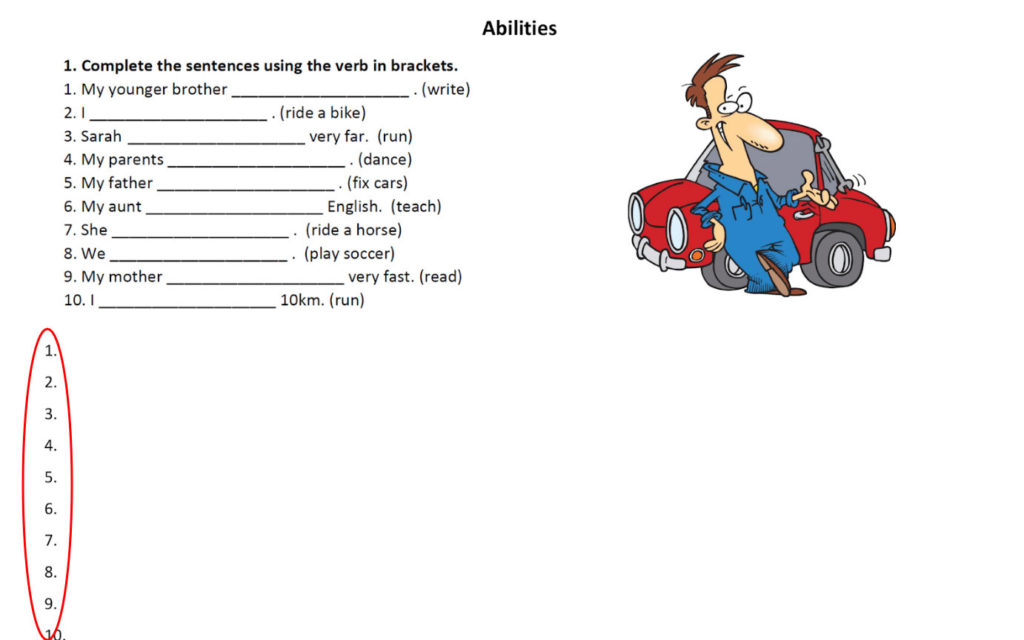
Add a title, then paste in the exercise from your pfd (Control + V). Click the left mouse button on a corner to resize it so it takes up less than half of the height of the paper. At this point you could add some clip art to make your worksheet look a more appealing.
4. Add numbers
Below the image we copy and pasted, we want to add numbers. Add numbers corresponding to each question in the exercise. Choose a font size and spacing so that there is as much space as possible, yet the numbers all fit on the page.
5. Save as a pdf
Save you worksheet first as a Word file, then save it as a pdf. If you intend to make worksheets with all the exercises from the original PDF, it’s a good idea to save your file twice with different filenames.
6. Convert to png
Go to www.pdf2png.com and convert the file as we did in the previous example.
7. Add background to Google Slides
Once again, make a new Google Slides presentation and add the png as a background as we did before (steps 2 and 3).
8. Add text boxes below
This time we are going to draw text boxes below the exercise, and next to the corresponding numbers that we typed (see image).
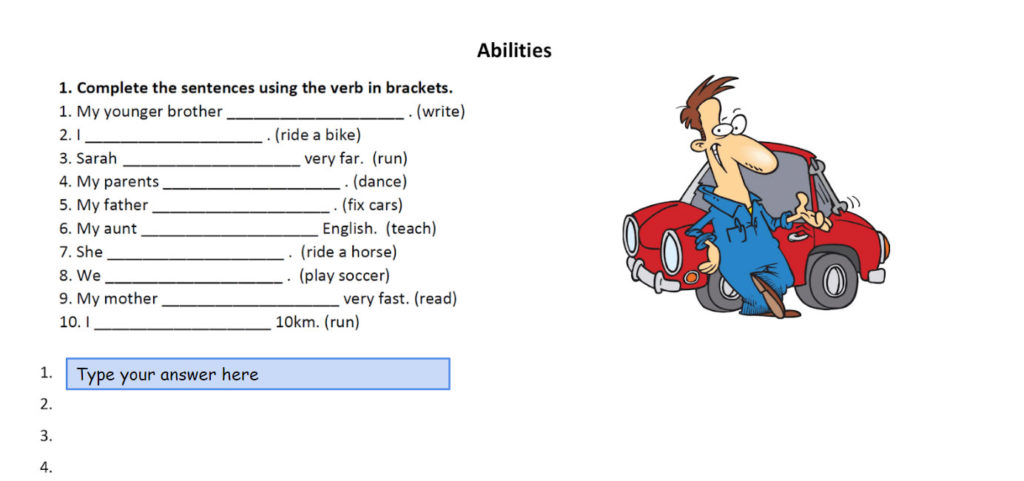
Format the text boxes as we did before (steps 4 and 5). When you are happy with their appearance, duplicate the text boxes as before (step 6).
9. Repeat for multiple exercises
Multiple exercises. Our original worksheet had 5 exercises on it. If we want to use all of those exercises with our students, we need to repeat this process with each exercise. However, we already have our worksheet template made in Word, so we can just swap out the image with the exercises. Remember to save both the word file and pdf with a different file name. Once the new png file has been added to Google slides, we can select all of the text boxes from the first slide and copy them onto the second slide. Easy peasy.
10. Share the link
Now our worksheet is ready, we need to add a tittle and we can share it. Once again, choose the ‘anyone with link can edit’ option to share the worksheet with your students via Google Classroom or whichever LMS you are using.
That’s All for our Google Slides worksheets from PDF guide
That brings us to the end of our guide on how to recreate Google Slides worksheets from PDF worksheets.
If you are looking for some ready-made Google Slide worksheets, we have several on our TpT store which may be useful if your students need practice with Daily Routines, Abilities (modal verb can), Past Simple, was/were, Future Plans and Intentions (‘Going to’ future), and experiences (Present Perfect). We also have a bundle containing all these worksheets with a great discount.